[center]
Lighting On Dynamic Entities:
You will need either Photoshop or GIMP
Step One: Textures
Open the entities _D2 first. If it does't already have a white alpha channel, give it one.
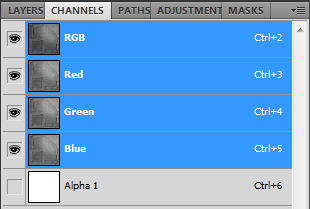
^ This is what it should look like in Photoshop.
Once you've done that, save the texture - in the same file as the original - as whatever it was called before but at the end put:
_dyntex_D
Next, run (if you are on Photoshop) the normal map filter plugin. If you do not have Photoshop or the normal map plugin use any normal map creation tool/plugin on the texture then open it back up.
Add an alpha channel to this normal map, again it must be completely white.
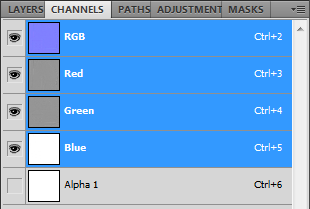
^ It should look like this in Photoshop
This must then be saved as the same name with
_dyntex_N at the end.
Now, re-open your
_dyntex_D and turn it black and white using your chosen software's, black and white filter or saturation tool. Then change the alpha channel from being completely white to black.
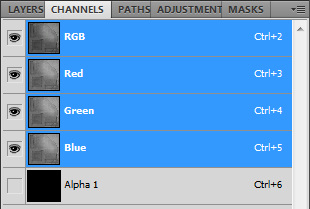
^ It should look like this in Photoshop and be saved as
_dyntex_S
All the required textures have been created, onto step 2.
Step 2: Using The Shader
Fire up FPSC X10. Create a simple room with a light. Then add your chosen entity into the room. Right click then entity; ensure it is set to dynamic else it will not appear when using the wibblyrelief shader. Change the name of the texture in the texture field to your new
_dyntex_D. Then change the effect field to
effectbank\skinning\wibblyrelief.fx.
Then run the test game and there you have it! Proper lighting on dynamic entities.
Thank you for reading!
